Haystack Saison(s)
One of Luke’s main focuses in our brewing lately has been on consistency. As much fun as it is throwing noodles at the wall to see what sticks, I think he’s right to insist that we build up our fundamental brewing skills to a place where we can follow a recipe and produce the same high-quality beer every time, whenever we want to. To that end, he procured a pretty large quantity of grain and hops so that we would have the materials on hand to make no less than five batches of Northern Brewer’s Haystack Saison.
We made the first two a few months back, to mixed results. We’ve been doubling up our batches lately, shooting for 10 gallons (although we usually come in closer to 9, annoyingly), splitting the batch after the boil, and taking advantage of a natural a/b test to experiment with applying different yeasts to the same wort. Last time we did this, we put our BE-134 (the recommended Saison yeast from Fermentis that comes with the kit) into about 6 gallons and some of my sourdough starter into the remaining 3 gallons.

Weirdly, the 3 gallon batch, which used all of the same equipment, came out absolutely drinkable. My sourdough starter seems has a habit of leaving a bit more sweetness at final gravity than I really enjoy, so I pitched some Brett Brux. at that point and gave it another 6 weeks to dry out. The result is a beer that I really enjoyed even pre-carbonation, and I can’t wait to try it cold and carbed. I also separated out just about a quarter of a gallon for an experiment and, following the advice of Scratch Brewing’s The Homebrewer’s Almanac, am doing a small secondary ferment on half a pound of cooked rhubarb. They claim that cooked rhubarb adds an interesting funkiness to saisons and brett beers that I’m very curious to try out.
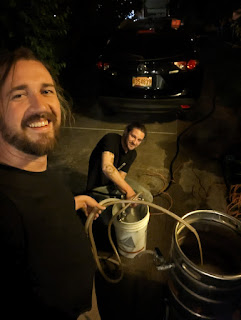
On to this brew! With some notable exceptions, every brew day we have goes just a little bit smoother, and this was one of the first times when I’ve really felt like we had things totally under control. After a bit of setup, we were able to sit back, drink a few beers with a friend and enjoy a sausage or two without running around and babysitting the brew. That’s a huge success all its own in my book.
We initially brought 15 gallons up to temp, which represents the very bleeding edge of what could fit in the kettle/HLT that we were using for this brew, but ended up ditching about two gallons of it because we just couldn’t fit it in our mash tun without doing a second sparge. I think that may be a sign that it’s time for us to upgrade.
Another area where I think we could improve here is in reducing the amount of water being absorbed by our grain. The squinting-at-your-thumb estimate for absorption here is about half a quart per pound of grain, which for the 21.5 lbs of grain we used should result in a loss of just over 2.5 gallons. We managed to fit about 7 gallons in the mash and 6 more in the sparge and ended up with just over 9.5 gallons of wort, meaning there’s an extra gallon in there somewhere. That’s not crazy, but I noticed some wort sitting on top of the grains after the mash that took some coaxing to get through, and it has me thinking about adding in some vertical tubes to give the liquid some extra pathways down.
We added a little more filtered water before boiling, since we were already sitting at a gravity of about 1.06 and probably boiled roughly 11 gallons all told. That seems like it was the right choice, because we also ended up with a starting gravity of 1.06 after the boil.
After cooling things down with a counterflow chiller, which I absolutely cannot recommend enough by the way, we split our batch into two carboys. We filled the larger carboy with about 5 gallons and pitched BE-134 again - hopefully this time we’ll get to taste the beer that this kit was actually supposed to make - and the smaller one got 4 gallons and BE-256. BE-256 is the Belgian Abbey style yeast from Fermentis, and we’re pretty curious to taste the difference between these two strains from the same region.

For the initial ferment, we’re keeping them in our basement, which usually sits around 65F. After that’s slowed down, we’re planning to bring them both up to the first floor, which stays a bit warmer during the summer. This should give the yeast just a tiny bit of heat stress, which helps Belgian strains produce their characteristic spiciness.
Will these beers taste the same? Will they be totally different? We have absolutely no idea. We’re planning to do a side-by-side comparison in a few weeks when I get back from a few trips and we will, of course, report back.
- 14 gallons filtered tap water
- 20 lbs Belgian Pale Malt
- 1.5 lbs Briess Caramel 20L
- 2.5 oz Hersbrucker @ 60 minutes
- 0.5 oz Hersbrucker @ 10 minutes
- 2.8g Gypsum
- 1.9g Epsom Salt
- 1 tsp yeast nutrient
- 1 packet BE-134 into ~5 gallons
- 1 packet BE-256 into ~4 gallons
- Mash in at 149, hold for an hour
- Drain mash, sparge at 160 for 20 minutes
- Boil for 1 hour, including additions as indicated
- Cool and transfer sanitized fermenters
- Aerate and pitch yeast
- Ferment at ~65F for 3 days and then allow to rise above 70F for two weeks
Comments
Post a Comment